As an Amazon Associate, I earn from qualifying purchases
To make a wood wick candle, secure the wood wick in the container and pour melted wax around it. Allow it to cool and trim the wick.
Wood wick candles are popular for their unique crackling sound and aesthetic appeal. They provide a rustic touch and a soothing ambiance. Making your own wood wick candle is simple and rewarding. You need a few basic supplies: a wood wick, wax, a container, and fragrance oil if desired.
Start by attaching the wick to the bottom of the container. Melt the wax and pour it around the wick, ensuring it is centered. Let it cool and set before trimming the wick to the desired length. Enjoy your handmade, aromatic wood wick candle.
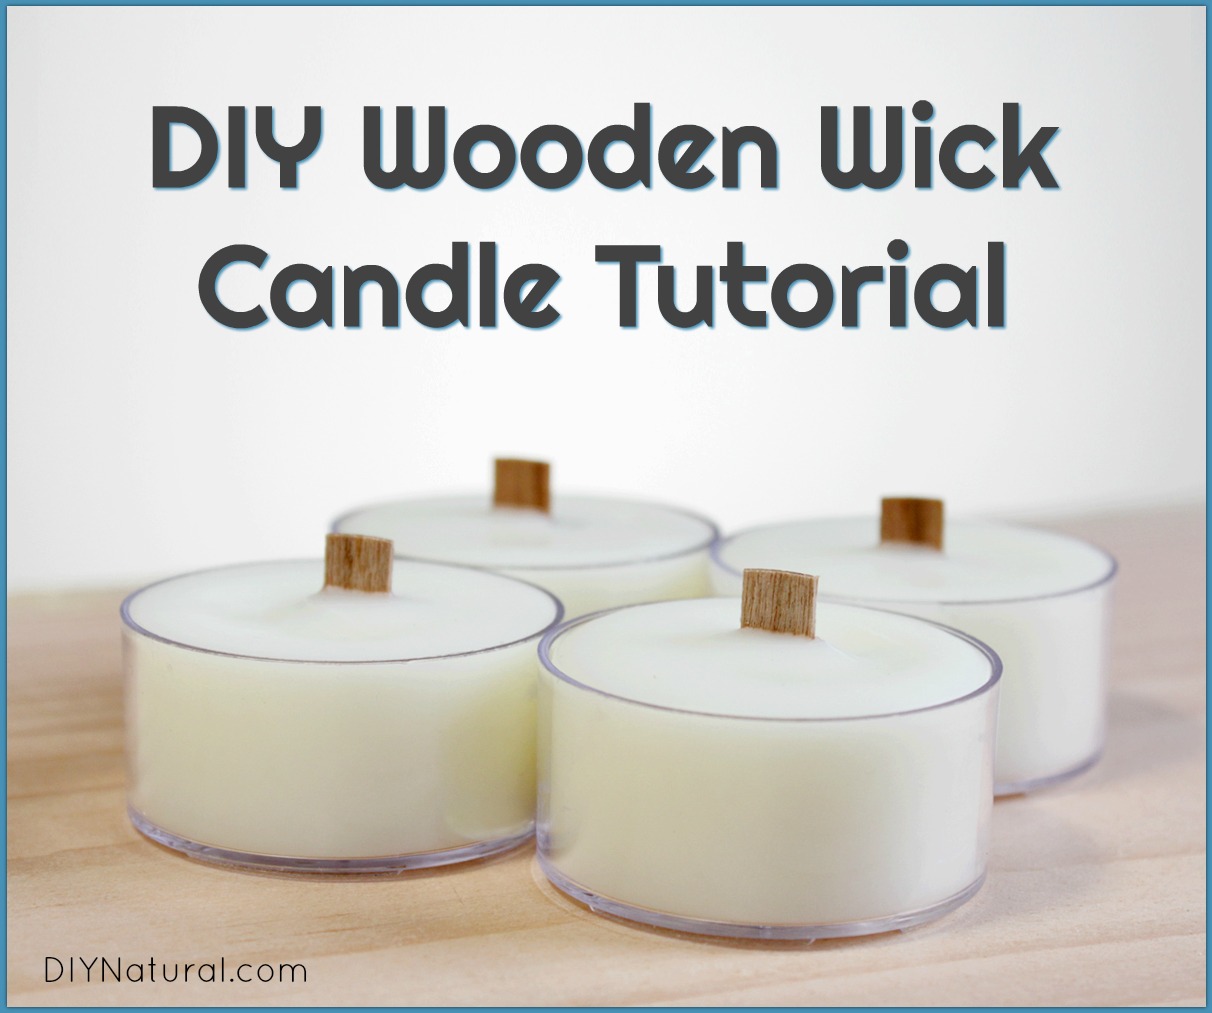
Credit: www.17apart.com
Materials Needed
Creating a wood wick candle requires specific materials. Some are essential, while others enhance the final product. Let’s dive into what you need.
Essential Supplies
Here is a list of the essential supplies you will need to make a wood-wick candle:
- Wood Wicks: Special wooden wicks that crackle when burning.
- Soy Wax: Provides a clean burn and is eco-friendly.
- Fragrance Oils: Adds delightful scents to your candle.
- Candle Jar: A heat-resistant container for your candle.
- Thermometer: Ensures the wax is at the right temperature.
- Double Boiler: Melts the wax evenly.
- Hot Glue Gun: Secures the wick to the jar.
- Wick Holder: Keeps the wick centered while the wax sets.
Optional Add-ons
These optional add-ons can enhance your candle-making experience:
| Item | Purpose |
|---|---|
| Color Dyes | Adds color to your candle. |
| Glitter | Gives your candle a sparkling effect. |
| Essential Oils | Provides natural scents. |
| Decorative Labels | Makes your candle look professional. |
With these materials, you can start making your own wood-wick candles. They are fun to make and offer a unique burning experience.
Preparing The Workspace
Creating a perfect wood wick candle starts with a well-prepared workspace. A clean, organized space ensures safety and efficiency. Let’s dive into the steps to set up your workspace effectively.
Safety Measures
Safety is the most important part of candle making. Begin by wearing protective gloves and safety goggles. This protects your skin and eyes from hot wax.
- Ensure good ventilation in the room.
- Keep a fire extinguisher nearby.
- Work on a heat-resistant surface.
Always have a plan for handling spills and splashes. Clear the area of flammable items.
Organizing Tools And Materials
Having your tools and materials organized saves time and makes the process smoother. Here’s a list of essentials you need:
| Tools | Materials |
|---|---|
| Double Boiler | Soy Wax |
| Thermometer | Wood Wicks |
| Pouring Pitcher | Fragrance Oils |
| Stirring Spoon | Wick Tabs |
| Measuring Scale | Candle Jars |
Arrange these tools and materials within easy reach. This minimizes movement and makes the process smoother.
Label your tools and materials if needed. This helps in easy identification. Use separate containers for different materials to avoid contamination.
Choosing The Wax
Choosing the right wax is crucial in making a wood-wick candle. The wax type affects the burn quality, scent throw, and overall appearance. Let’s explore the best options available.
Types Of Wax
There are several types of wax to choose from:
- Soy Wax
- Beeswax
- Paraffin Wax
- Coconut Wax
- Blended Wax
Pros And Cons Of Each Type
| Wax Type | Pros | Cons |
|---|---|---|
| Soy Wax |
|
|
| Beeswax |
|
|
| Paraffin Wax |
|
|
| Coconut Wax |
|
|
| Blended Wax |
|
|
Each wax type has its unique qualities. Choose the one that fits your needs best.
Selecting The Wood Wick
Choosing the right wood wick is crucial for a successful candle. The wick impacts burn quality and fragrance throw. Selecting a suitable wood wick ensures your candle performs well.
Types Of Wood Wicks
Wood wicks come in various types. Each type creates a unique burning experience. The most common types are:
- Single-Ply Wicks: Made from a single layer of wood. They create a gentle crackling sound.
- Multi-Ply Wicks: Composed of multiple layers of wood. They produce a stronger flame and louder crackling.
- Booster Wicks: Have a vertical strip in the center. This helps in better burning and a more robust flame.
How To Choose The Right Size
Choosing the right wick size is essential for optimal candle performance. Too large or too small can cause problems. Here’s how to pick the right size:
- Measure the Diameter: Measure the diameter of your candle container. This helps determine the appropriate wick size.
- Check the Manufacturer’s Guide: Refer to the manufacturer’s sizing chart. They provide recommendations based on container size.
- Test Burn: Perform a test burn with different wick sizes. This helps you find the best fit for your candle.
Using the correct wood wick ensures a clean, even burn. It also enhances the candle’s fragrance throw. Always choose carefully for the best results.
Adding Fragrance And Color
Adding fragrance and color to your wood wick candle makes it unique. These elements can elevate the candle’s appeal, making it a perfect gift.
Choosing Essential Oils
Essential oils add a delightful aroma to your candle. They are natural and safe. Choose oils based on their scents and benefits.
- Lavender: Calming and relaxing.
- Eucalyptus: Refreshing and energizing.
- Vanilla: Sweet and comforting.
Use 10-15 drops of essential oil per ounce of wax. Mix the oil thoroughly with melted wax for an even scent.
Using Natural Dyes
Natural dyes give your candle a beautiful hue. They are eco-friendly and safe.
- Beetroot powder: Gives a red or pink color.
- Turmeric: Provides a yellow or golden shade.
- Spirulina: Offers a green tint.
Add a small amount of dye to the melted wax. Stir well to blend the color evenly.
| Essential Oil | Fragrance |
|---|---|
| Lavender | Calming |
| Eucalyptus | Refreshing |
| Vanilla | Sweet |
| Natural Dye | Color |
|---|---|
| Beetroot powder | Red/Pink |
| Turmeric | Yellow/Golden |
| Spirulina | Green |
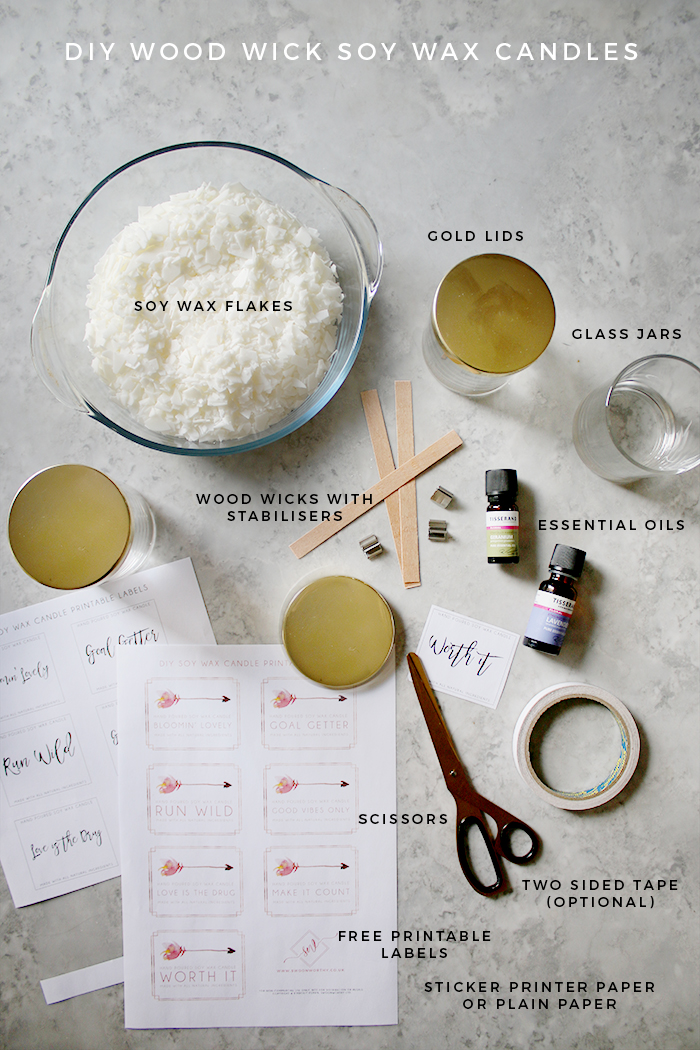
Credit: diynatural.com
Melting The Wax
Melting the wax is a crucial step in making a wood-wick candle. It ensures the wax is ready for molding and blending with fragrances. There are two main methods for melting wax: the double boiler method and using a microwave.
Double Boiler Method
The double boiler method is a safe way to melt wax.
- Fill the bottom pot with water.
- Place it on the stove and heat it on medium.
- Put the wax in the top pot or bowl.
- Stir the wax as it melts.
- Keep an eye on the temperature.
Be sure the wax does not exceed 180°F (82°C). Use a thermometer to check.
Using A Microwave
Using a microwave is faster and easier for small batches.
- Place the wax in a microwave-safe container.
- Set the microwave to medium-high power.
- Heat the wax in 30-second intervals.
- Stir the wax after each interval.
- Continue until the wax is fully melted.
Watch the wax closely to avoid overheating.
Both methods are effective for melting wax. Choose the one that suits your needs best.
Pouring The Wax
Pouring the wax is a crucial step in making wood-wick candles. This process ensures your candle burns evenly and looks beautiful. Let’s dive into the steps for pouring the wax correctly.
Preparing The Container
First, clean your container. Remove any dust or dirt. This ensures a smooth candle surface. Next, place the wood wick in the container. Use a wick holder to keep it straight.
| Step | Description |
|---|---|
| 1 | Clean the container |
| 2 | Place the wood wick |
| 3 | Use a wick holder |
Proper Pouring Techniques
Melt the wax to the recommended temperature. Use a thermometer for accuracy. Pour the wax slowly into the container. Avoid pouring too fast to prevent bubbles.
- Melt wax to the right temperature.
- Use a thermometer for accuracy.
- Pour slowly to avoid bubbles.
Allow the wax to cool and harden. This can take several hours. Avoid moving the container during this time.
- Allow the wax to cool.
- Do not move the container.
Setting The Wick
Creating a wood wick candle at home can be a rewarding experience. One crucial step in this process is setting the wick correctly. A well-placed wick ensures an even burn and beautiful flame. Let’s dive into the steps for securing and aligning your wood wick for the best results.
Securing The Wick
First, gather your materials. You will need:
- Wood wick
- Wick clip
- Glue dots
- Heat-safe container
Start by attaching the wood wick to the wick clip. Use a glue dot to secure the clip to the bottom of your container. Press firmly to ensure it sticks well. This step prevents the wick from moving during the candle-making process.
Ensuring Proper Alignment
Proper alignment of the wick is essential. A misaligned wick can cause uneven burning. Here’s how to ensure it is centered:
- Place the container on a flat surface.
- Use a ruler to find the center of the container.
- Adjust the wick so it stands straight and is centered.
Double-check the alignment from different angles. A centered wick will give your candle a more consistent burn and a beautiful flame.
If needed, you can use a wick holder to keep it in place until the wax hardens. This extra step ensures the wick remains in the correct position.
| Step | Action |
|---|---|
| 1 | Attach wick to clip |
| 2 | Secure clip with a glue dot |
| 3 | Center the wick |
| 4 | Adjust alignment |
By following these steps, you ensure that the wick is set perfectly. This is key to making a beautiful and functional wood wick candle.
Finishing Touches
Finishing touches can elevate your wood wick candle from good to great. These last steps ensure your candle is beautiful and functions properly. Let’s explore these important details.
Trimming The Wick
Trimming the wick is crucial for a clean burn. A long wick can cause excessive smoke and soot. Use a wick trimmer or scissors to trim the wick. Aim for a length of about 1/4 inch. This length helps the candle burn evenly and last longer. It’s also safer, reducing the risk of a high flame. Always trim your wick before each use.
Adding Labels And Decorations
Labels can add a professional touch to your candle. They provide important information like the scent and burn time. Use a simple label maker or print custom designs. Ensure the labels are affixed neatly and securely.
Decorations make your candle unique and visually appealing. You can add ribbons, charms, or even dried flowers. Just ensure any decorations are safe and won’t catch fire. Here are some decoration ideas:
- Ribbons around the jar
- Small charms attached to the wick
- Dried flowers embedded in the wax
Remember, the goal is to enhance the candle’s look without compromising safety.
Credit: www.swoonworthy.co.uk
Frequently Asked Questions
What Materials Are Needed For Wood Wick Candles?
You need wax, a wooden wick, a wick sustainer, and fragrance oil.
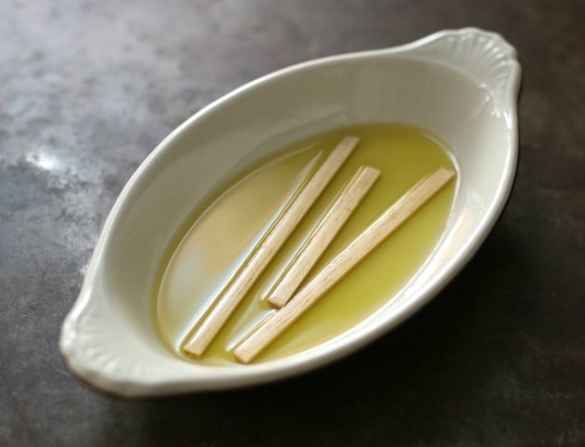
How Do You Prepare The Wooden Wick?
Soak the wick in olive oil for 20 minutes.
Can You Use Any Type Of Wax?
Soy wax is recommended for wood-wick candles.
How Long Should The Wick Be?
The wick should be one inch above the wax.
How Do You Secure The Wick?
Use a wick sustainer to keep it in place.
What Type Of Container Is Best?
Heat-resistant glass containers work best.
How Do You Melt The Wax?
Melt the wax in a double boiler.
When Should You Add Fragrance Oil?
Add fragrance oil when the wax reaches 185°F.
How Long Should The Candle Cure?
Let the candle cure for 24 hours.
Why Choose A Wood Wick Candle?
Wood wicks provide a soothing crackling sound.
Conclusion
Creating a wood wick candle is a rewarding and simple DIY project. You only need a few materials and patience. Enjoy the cozy ambiance of your homemade candles. Experiment with different scents and waxes for unique creations. Share your experiences and inspire others to craft their own wood-wick candles.
As an Amazon Associate, I earn from qualifying purchases